Creating the CelsiusConverter GUI
This section explains how to use the NetBeans IDE to create the application's GUI. As you drag each component from the Palette to the Design Area, the IDE auto-generates the appropriate source code.
Step 1: Set the Title
First, set the title of the application'sJFrame to "Celsius Converter", by
single-clicking the JFrame in the Inspector:
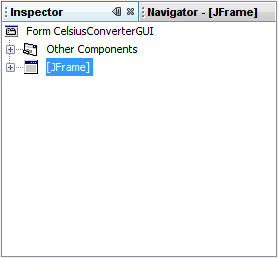
Selecting the JFrame
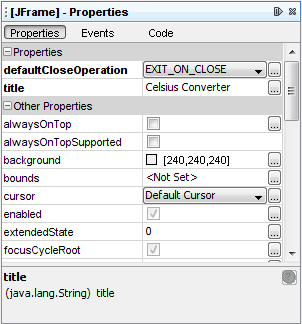
Setting the Title
 button and entering the
title in the provided field. Or, as a shortcut, you could single-click the
button and entering the
title in the provided field. Or, as a shortcut, you could single-click the
JFrame of the inspector and enter its new text directly without
using the property editor.
Step 2: Add a JTextField
Next, drag aJTextField from
the Palette to the upper left corner of the Design Area. As you approach
the upper left corner, the GUI builder provides
visual cues (dashed lines) that suggest the appropriate spacing. Using
these cues as a guide, drop a JTextField into the upper left hand
corner of the window as shown below:
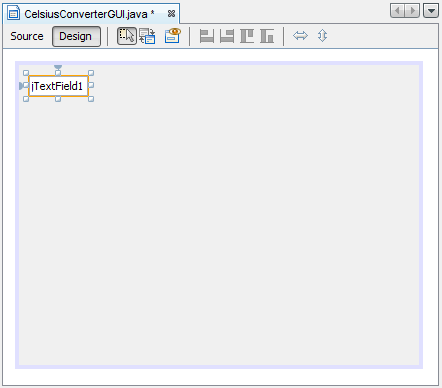
Adding a JTextField
Step 3: Add a JLabel
Next, drag aJLabel onto the Design Area. Place it to the right of the
JTextField, again watching for visual cues that suggest
an appropriate amount of spacing. Make sure that text base for this component
is aligned with that of the JTextField.
The visual cues provided by the IDE should make this easy to determine.
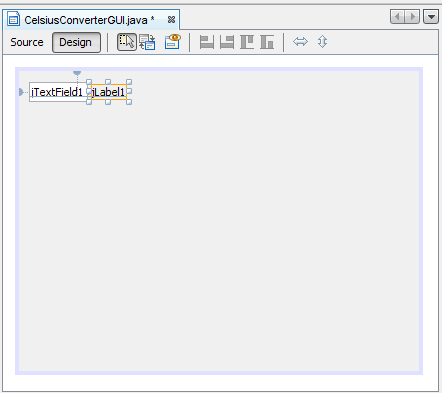
Adding a JLabel
Step 4: Add a JButton
Next, drag aJButton from the Palette and position it to the left and underneath the JTextField.
Again, the visual cues help guide it into place.
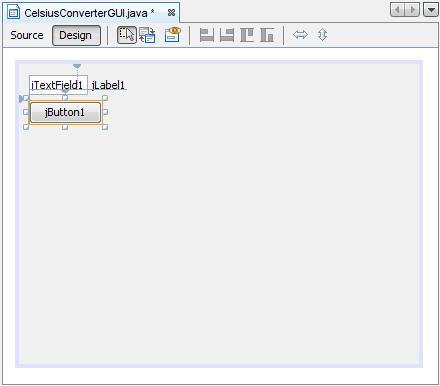
Adding a JButton
You may be tempted to manually adjust the width of the JButton
and JTextField, but just leave them as they are for now. You will learn
how to correctly adjust these components later in this lesson.
For more information about this component, see
How to Use Buttons
.
Step 5: Add a Second JLabel
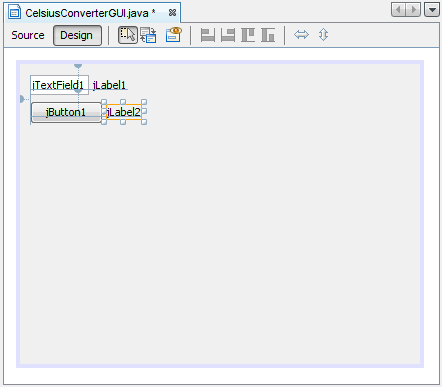
Adding a Second JLabel
Finally, add a second JLabel, repeating the process in step 2. Place this
second label to the right of the JButton, as shown above.
