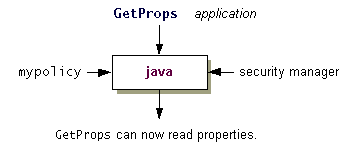
Now that you have added the required policy entry to themypolicypolicy file, you should be able to read the specified properties when you execute theGetPropsapplication with a security manager, as shown in the following figure.As noted at the end of the Quick Tour of Controlling Applets lesson, whenever you run an unsigned applet, or an application with a security manager, the policy files that are loaded and used by default are the ones specified in the "security properties file", which is located at
  Windows:
    java.home\lib\security\java.security
  UNIX:
    java.home/lib/security/java.security
Note: java.home indicates the directory into which the JRE was installed.There are two possible ways you can have the
mypolicyfile be considered as part of the overall policy, in addition to the policy files specified in the security properties file. You can either specify the additional policy file in a property passed to the runtime system, as described in Approach 1, or add a line in the security properties file specifying the additional policy file, as discussed in Approach 2.
Approach 1
You can use a-Djava.security.policyinterpreter command line argument to specify a policy file that should be used in addition to the ones specified in the security properties file.Make sure that you are in the directory containing
GetProps.classandmypolicy. Then you can run theGetPropsapplication and pass themypolicypolicy file to the interpreter by typing the following command on one line:Note: Remember thatjava -Djava.security.manager -Djava.security.policy=mypolicy GetProps-Djava.security.manageris required in order to run an application with a security manager, as shown in the See How to Restrict Applications step.The program reports the values of the
"user.home"and"java.home"properties.If the application still reports an error, something is wrong in the policy file. Use the Policy Tool to check the policy entry you just created in the Set up the Policy File to Grant the Required Permissions step.
Approach 2
You can specify a number of URLs inpolicy.url.nproperties in the security properties file, and all the designated policy files will get loaded. So one way to have yourmypolicyfile's policy entries considered by thejavainterpreter is to add an entry specifying that policy file in the security properties file.You created such an entry in the last part of the Quick Tour of Controlling Applets lesson. If your security properties file still has that entry, you're ready to run the application. Otherwise you need to add the entry. To do so, open the security properties file in an editor suitable for editing an ASCII text file. Then add the following line after the line containing
policy.url.2:If you're on a Windows system, addpolicy.url.3=file:/C:/Test/mypolicyIf you're on a UNIX system, add
On a UNIX system you can alternatively explicitly specify your home directory, as inpolicy.url.3=file:${user.home}/test/mypolicypolicy.url.3=file:/home/susanj/test/mypolicy
Run the Application
Now you should be able to successfully run the following.java -Djava.security.manager GetPropsAs with approach 1, if you still get a security exception, something is wrong in the policy file. Use the Policy Tool to check the policy entry you just created in the Set up the Policy File to Grant the Required Permissions step. Then fix any typos or other errors.
Important: You do not need to include themypolicyfile unless you are running this Tutorial lesson. To exclude this file, open the security properties file and delete the line you just added.Before continuing, you may want to delete the line you just added in the security properties file (or comment it out), since you probably do not want the
mypolicyfile included when you are not running the tutorial lessons.
