Previous Page Next Page

Setting and Retrieving Session Data

You can access the Django session framework from the browser by accessing the session attribute of the HttpRequest object in a view function. The session attribute acts like a standard Python dictionary. You add items to and get items from the session using standard dictionary syntax.

By the Way

The session dictionary accepts any pickleable Python object. This functionality allows you to store a variety of data in the session.


For example, the following code snippet creates, retrieves, and deletes a key named i_feel in the session:

request.session['i_feel'] = 'happy'
mood = request.session['i_feel']
del request.session['i_feel']

By the Way

When you define names for entries in the session store, avoid using names that begin with the underscore character. Names beginning with an underscore are reserved for Django.


The following line of code checks to see if the i_feel key exists in the session:

if 'i_feel' in request.session:
. . .

You can also use the get(key, default=None), keys(), and items() dictionary functions on the session attribute.

Setting values in the session attribute stores them in the session, where they can be accessed by other view functions that the user accesses.

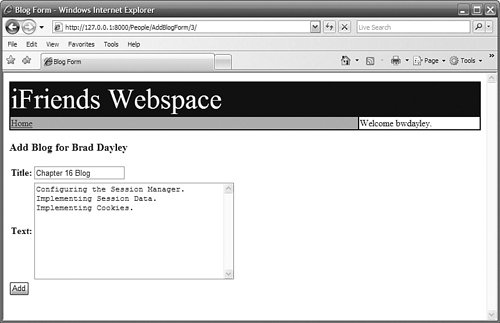
Try It Yourself: Set and Retrieve Session Data

In this section, you will modify the add_blog() function to add a session_blog key to the session when the user creates a new blog. Then you will add a check to the add_blog() function to determine if the user has already added a blog entry. Finally, you will redirect the add_blog request to the generic blog_details view of the blog that was already created.

Follow these steps to make the changes to the add_blog() view function:

1.
Open the iFriends/People/views.py file in an editor.

2.
Modify the following import statement to include the HttpResponseRedirect() function:

from django.http import HttpResponse, HttpResponseRedirect

3.
Add the update_blog() view function, shown in Listing 16.2, to the file that will build a blog update form that includes data from an existing blog. This form will handle the POST request and will redirect the browser to the blog details page.

4.
Save the iFriends/People/views.py file in an editor.

5.
Create and open a file named iFriends/templates/People/update_blog_form.html in an editor.

6.
Add the contents shown in Listing 16.3 to extend the base site template and display a blog update form.

7.
Save the iFriends/templates/People/update_blog_form.html file.

8.
Open the iFriends/People/views.py file in an editor.

9.
Add the following line of code, shown in Listing 16.4, to set the session_blog value in the session data when the user adds a new Blog object:

request.session['session_blog'] = bObj.id

10.
Add the following check at the beginning of the add_blog() function, shown in Listing 16.4, to determine if a blog has already been added to the session. If it has, redirect the browser to the update page for that Blog object:

if 'session_blog' in request.session:
    return HttpResponseRedirect("/generic/blog_details/%d" %
                request.session['session_blog'])

11.
Save the iFriends/People/views.py file.

12.
Open the iFriends/People/urls.py file in an editor.

13.
Add the following URL pattern to enable the update_blog() view:

(r'^UpdateBlog/(?P<bID>\d+)/$', 'update_blog'),

14.
Save the iFriends/People/urls.py file.

15.
Log in to the website as a user, and access that user's details page.

16.
Click the + link above the blog list to bring up the add_blog() view, shown in Figure 16.2.

Figure 16.2. The blog form generated by the add_blog() view.


17.
Add valid blog data to the form, and click the Add button.

18.
Access the user page again, and click the + link again. This time you should be redirected to the update_blog() view for the last blog entry you created, shown in Figure 16.3.

Figure 16.3. The update_blog() view generated when the session already has a session_blog defined.


19.
Click the Update button. You should be redirected to the details view of the updated blog, shown in Figure 16.4.

Figure 16.4. The generic details view of the updated Blog object.


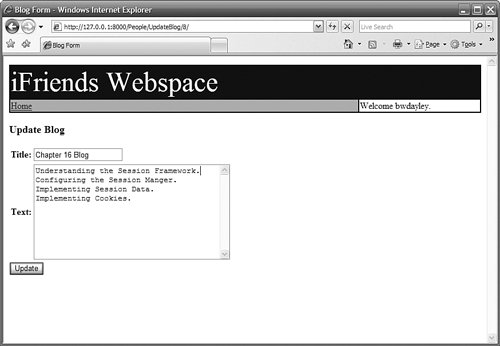
Listing 16.2. The update_blog() Function in the iFriends/People/views.py File

def update_blog(request, bID='0'):
    blog = get_object_or_404(Blog, pk=bID)
    BlogForm = forms.form_for_instance(blog, fields=('title', 'text'))
    bf = BlogForm()    message = 'Update Blog'

    if request.method == 'POST':
        if request.POST['submit'] == 'Update':
            blog.title = request.POST['title']
            blog.text = request.POST['text']
            blog.date = datetime.now()
            try:
                blog.save()
                return HttpResponseRedirect("/generic/blog_details/%d" % blog.id)
            except:
                message = 'Database Error.'

    return render_to_response('People/update_blog_form.html',
         {'bForm':bf, 'message': message},
         context_instance = RequestContext(request))


Listing 16.3. Full Contents of the iFriends/templates/People/update_blog_form.html Template File

{% extends "iFriends_base.html" %}

{% block title %}Blog Form{% endblock %}
{% block content %}
<h3>{{ message }}</h3>

<form method="post" action=".">
<table>
{{ bForm }}
</table>
<input type="submit" name="submit" value="Update" />
</form>
{% endblock %}

Listing 16.4. A Portion of the add_blog() Function in the iFriends/People/views.py File

def add_blog(request, pID='0'):
    if not request.user.has_perm('People.can_blog'):
           return HttpResponseRedirect('/')

    if 'session_blog' in request.session:
        return HttpResponseRedirect("/generic/blog_details/%d" %
                     request.session['session_blog'])
. . .
                try:
                    bObj = save_bf.save()
                    p.blogs.add(bObj)
                    p.save()
                    message = 'Blog added to %s.' % p.name
                    request.session['session_blog'] = bObj.id
. . .


Previous Page Next Page