Previous Page Next Page

Hour 15. Adding Website Security

What You'll Learn in This Hour

  • How to add login functionality

  • How to add logout functionality

  • How to verify authentication

  • How to verify permissions

  • How to limit access to generic views

Hour 14, "Managing Site Users," covered creating users and groups and setting permissions for both. This hour discusses securing the website by forcing users to be authenticated and logged into the site to gain access to certain pages. It also discusses how to use permissions to verify that users can view and change content.

Implementing User Logins

The first step in adding security to the website is creating User objects so that you know who is trying to access the website. The second step is implementing a login to force users to enter a password before they are admitted to the website.

The login process has three steps. The first is to prompt the user for his or her username and password. The next step is to authenticate the user by verifying that the username and password match a User object that exists in the database. The final step is to log the user into the website by adding the authenticated User object to the user's session. (Sessions are discussed more in Hour 16, "Managing Sessions and Cookies.")

Did you Know?

Django provides a simple way to implement logins using the django.contrib.auth.views.login view. You add the pattern (r'^accounts/login/$', login) to the URLs.py file to enable the view and then create a template named registration/login.html that creates a form. I won't cover this view in more detail here, because it uses the old forms library and likely will change. (See www.djangoproject.com for more details.)


Django provides the django.contrib.auth.authenticate() function to help you verify that usernames and passwords match User objects in the database. The authenticate() function takes the username and password as arguments and then checks them against the database and returns the matching User object if one is found. If no match is found, authenticate() returns None. For example, the following code tries to authenticate a user named Bill:

user = authenticate(username = 'bill', password = 'billPass')
if user is not None:
    #authenticated
else:
    #bad username or password

By the Way

You can also manually check the password using the django.contrib.auth.models.check_password() function. The check_password() function takes a string password as the first argument and the password attribute, containing the password hash, of the User object as the second. It returns True if they match and False if they don't. For example:

check_password('billPass', user.password)


After you use the authenticate() function to get a valid user, you can use the django.contrib.auth.login() functions to actually log the user into the website. The login() function accepts the HttpRequest object as the first argument and the User object as the second. You also should verify that the is_active attribute of the User object is true before calling login(). The following example shows how to log the User object into the session:

if user.is_active:
    login(request, user)
else:
    #account has been disabled

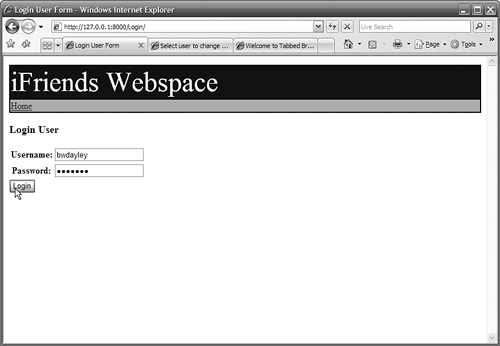
Try It Yourself: Implement a User Login Page

In this section, you will create a view function and template that prompt users to enter a username and password. The view function checks the username and password against User objects in the system and logs in the user if they match.

Follow these steps to create a user login view and enable it to log in users:

1.
Create and open a file called iFriends/templates/registration/login.html in an editor.

2.
Add the contents, shown in Listing 15.1, to extend the site base template and display a login form using the variable lForm.

3.
Save the iFriends/templates/registration/login.html file.

4.
Open the iFriends/Home/views.py file in an editor.

5.
Add the following import statement, shown in Listing 15.2, to import the authenticate() and login() functions:

from django.contrib.auth import authenticate, login

6.
Add the following lines of code, shown in Listing 15.2, to define a LoginForm class with username and password Fields that you can use to prompt the user for input and validate:

class LoginForm(forms.Form):
    username = forms.CharField(max_length=30)
    password = forms.CharField(max_length=20, widget=forms.PasswordInput())

7.
Add the following lines of code, shown in Listing 15.2, to define the login_user() view function, accept an optional next argument, create an instance of a LoginForm object, and render the form using the login.html template file:

def login_user(request, next= '/'):
    message = 'Login User'
    lForm = LoginForm()
. . .
    return render_to_response('registration/login.html',{
                'lForm': lForm,
                'message': message })

8.
Add the following lines of code to see if the GET request included a next key to indicate where to redirect successful logins and to set the next variable accordingly:

if request.GET.has_key('next'):
    next = request.GET['next']

9.
Add the following lines of code, shown in Listing 15.2, to handle the POST request that the user submits to log in to the website:

if request.method == 'POST':
    if request.POST['submit'] == 'Login':

10.
Add the following lines of code, shown in Listing 15.2, to validate the LoginForm. If it's valid, authenticate the user:

if lForm.is_valid():
    uName = request.POST['username']
    uPass = request.POST['password']
    user = authenticate(username=uName, password=uPass)

11.
Add the following lines of code, shown in Listing 15.2, to verify that the user could be authenticated and verify that the account is active. Then use the login() function to log the user into the website and redirect to the URL specified by the next argument:

if user is not None:
    if user.is_active:
        login(request, user)
        return HttpResponseRedirect(next)
    else:
        message = 'Account Deactivated'
else:
    message = 'Login Incorrect'

12.
Save the iFriends/Home/views.py file.

13.
Open the iFriends/urls.py file in an editor.

14.
Add the following URL pattern to enable the login_user() view:

(r'^Login/$', 'iFriends.Home.views.login_user'),

15.
Save the iFriends/urls.py file.

16.
Go to the following URL in a web browser to bring up the login_user() view, as shown in Figure 15.1:

http://127.0.0.1:8000/Login/

Figure 15.1. The user login form generated by the user_login() view.


17.
Enter a valid username and password for the site, and click the Login button. Verify that the home page comes up.

By the Way

The admin interface uses the same session that the website does. When you log in as a different user, this affects your rights to the admin interface based on what rights the new user has. If you still want to use the admin interface, you may need to log in again as a user with rights to the admin interface.


Listing 15.1. Full Contents of iFriends/templates/registration/login.html

{% extends "iFriends_base.html" %}
{% block title %}Login User Form{% endblock %}
{% block content %}
<h3>{{ message }}</h3>
<form action="" method="post">
<table>
{{ lForm }}
</table>
<input type="submit" name="submit" value="Login" />
</form>
{% endblock %}

Listing 15.2. Imports, LoginForm Definition, and the login_user() Function in the iFriends/Home/views.py File

from django.contrib.auth import authenticate, login
. . .
class LoginForm(forms.Form):
        username = forms.CharField(max_length=30)
        password = forms.CharField(max_length=20, widget=forms.PasswordInput())
. . .
def login_user(request, next= '/'):
    message = 'Login User'
    lForm = LoginForm()
if request.GET.has_key('next'):
    next = request.GET['next']

if request.method == 'POST':
    if request.POST['submit'] == 'Login':
        postDict = request.POST.copy()
        lForm = LoginForm(postDict)
        if lForm.is_valid():
            uName = request.POST['username']
            uPass = request.POST['password']
            user = authenticate(username=uName, password=uPass)
            if user is not None:
                if user.is_active:
                    login(request, user)
                    return HttpResponseRedirect(next)
                else:
                    message = 'Account Deactivated'
            else:
                message = 'Login Incorrect'

return render_to_response('registration/login.html',{
            'lForm': lForm,
            'message': message })


Previous Page Next Page