Custom filters are useful and simple to create. However, for more complex actions on data, you will want to use custom tags. Custom tags can do just about anything because of how they are implemented.
Custom tags split the work between distinct parts—a compilation function and a renderer object. Creating a custom tag involves first creating a renderer object, and then creating a compilation function that returns an instance of the renderer object, and, finally, registering the tag with the custom tag library.
The renderer object is a subclass of the template Node object that includes a render() function that outputs the contents of the Node.
To create the renderer object, create a new class that extends the template.Node object and includes a render function that renders the output. For example, the following code snippet creates a renderer class that accepts a string object when it is created and renders the string to lowercase:
class doLOWNode(template.Node):
    def __init__(self, aStr):
    self.aStr = aStr
def render(self, context):
    return self.aStr.lower()
The compilation function determines how the tag is rendered into a template Node. When the custom tag is encountered in a template, the parser calls the compilation function with the parser object and the tag contents. For example, in the following tag:
{% doLOW "Some Text" %}
the following value is passed to the compilation function:
doLOW "Some Text"
The compilation function is responsible for returning a template Node object based on the tag's contents.
For example, the following code defines a compilation function that processes a tag that accepts a string argument and uses that string to return an instance of the doLOWNode object defined a moment ago:
def doLOW(parser, token):
    try:
        tag_name, aStr = token.split_contents()
    except ValueError:
        raise template.TemplateSyntaxError, "Requires 1 argument"
    if not (aStr[0] == aStr[-1] and aStr[0] in ('"', "'")):
        raise template.TemplateSyntaxError, "Argument should use quotes"
    return doLOWNode(aStr[1:-1]) #Removes the beginning and ending quotes
Watch Out!
The preceding code uses the split_contents() function of the token object to split the tag and argument from the tag contents variable token. You should use the split_contents() method instead of the Python string function split(). split() doesn't understand that values in quotes shouldn't be split, so any spaces in the string would be split into separate tokens.
By the Way
The compilation function is responsible for raising TemplateSyntaxError exceptions if the contents do not match what is expected. Notice that the preceding code checks the number of arguments and encloses the argument in quotes.
After you have defined the renderer object and the compilation class, you need to register the custom tag with the Library object using the following syntax:
register.tag('doLOW', doLOW)
Did you Know?
Just as with custom filters, if you are using Python 2.4 or later, you can register the tag using a decorator function, as shown in the following example:
@register.tag(name="doLOW")
The following sections describe some custom tags that help you make more dynamic custom tag libraries.
Frequently you may find yourself creating tags that accept a string and simply output a different form of the string. Django provides a special type of filter that is much easier to create and manage to handle these needs.
The simple_tag filter allows you to quickly define a tag function that accepts one or more arguments, processes them, and returns a string. To show you how simple this process is, the following code creates a simple_tag that accepts a string and converts it to uppercase:
def doUP(aStr):
    return aStr.upper()
register.simple_tag(doUP)
Basically the doUP example works the same as the doLOW tag, except that doUP is done in only three lines of code.
You could access it from the template using the following code:
{% doUP "Some Text" %}
By the Way
If you pass variables to the simple_tag, the value of the objects gets passed, not the variables themselves.
At times you may want to create a filter that processes a block of text, variables, and other data. This is where the parser argument to the compilation function comes in. Using the parse() function of the parser object, you can parse from the beginning block tag to an end block tag.
The parse() function returns a list of template Node objects that exist between the two blocks. You can pass that Node list to the renderer, and then the renderer can apply the tag function to all nodes in the block.
For example, you could create the following compilation function that parses the template until it finds the endUToSpace tag to create a Node list:
def doUToSpace(parser, token):
    nodelist = parse(('endUToSpace',))
    parser.delete_first_token()
    return doUToSpaceNode(nodelist)
By the Way
You need to remove the first token in the parser, as shown in the following line of code, because it will not have consumed the endUToSpace tag yet:
parser.delete_first_token()
The following code defines the renderer object for the compilation function just shown. It accepts the Node list on creation. Then it renders the Node list using the render() function to get all the text that is output by the Nodes. Finally, it applies the replace() function to the entire output:
class doUToSpaceNode(template.Node):
    def __init__(self, nodelist):
        self.nodelist = nodelist
    def render(self, context):
        outText = self.nodelist.render(context)
        return outText.replace('_', ' ')
The following line of code registers the UToSpace tag in the library:
@register.tag(name="UToSpace")
The following line of code accesses the UToSpace tag using both text and variables:
{% UToSpace %}
This_block_of_text_is_filled_with_underscores.
So_is_this_variable_{{ NoSpaceData }}.
{% endUToSpace %}
One of the most valuable things about using custom tags is that you have access to the template context. That means that you can both read variables from the context and create new variables in the context that can be accessed in the template.
Remember that the tag contents argument that gets passed to the compilation function includes only the text inside the tag statement. So if you pass a variable as an argument to the tag, it shows up as just the variable name.
To solve this problem, Django provides the Variable class. The Variable class accepts the variable name in its constructor. The Variable class contains a resolve() function that resolves the variable name inside the template context and returns the actual variable object.
For example, the following compilation function parses the makeFTime tag contents, gets the variable name of a datetime object, and uses that variable object to create a makeFTimeNode object:
def makeFTime(parser, token):
    try:
        tag_name, aTime = token.split_contents()
    except ValueError:
        raise template.TemplateSyntaxError
    return makeFTimeNode(aTime)
The following renderer class uses the variable name to create a Variable object when creating an instance of the class. Then, in the render function, it uses the resolve() function of the Variable object to pull the datetime object out of the template context so that it can be rendered with a specific format and returned:
class makeFTimeNode(template.Node):
    def __init__(self, aTime):
        self.aTime = template.Variable(aTime)
    def render(self, context):
        aTime = self.aTime.resolve(context)
        return aTime.strftime("%m/%d/%Y %I:%M%p")
The makeFTime tag could be accessed from the template using the following code:
{% makeFTime someTime %}
Let's take this a step further. What if you wanted the custom tag to create a new variable with the formatted time as its value so that it could be referenced in several places in the template? Because you have access to the context dictionary from the render function, this is a simple process. The following code shows the makeFTimeNode render function, which adds the formatted time to the context as the variable FTime and returns an empty string:
class makeFTimeNode(template.Node):
    def __init__(self, aTime):
        self.aTime = template.Variable(aTime)
    def render(self, context):
        aTime = self.aTime.resolve(context)
        context['FTime'] = aTime.strftime("%m/%d/%Y %I:%M%p")
        return ''
Now you could use the makeFTime tag to create a new context variable that could be accessed elsewhere in the template, as shown in the following code:
{% makeFTime someTime %
The next meeting will start: {{ FTime }}
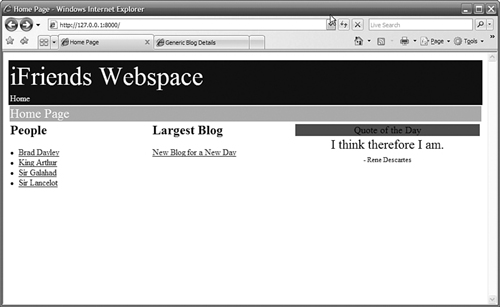
Try It Yourself: Create a Custom Tag That Retrieves and Sets Context VariablesIn this section, you will create a custom tag that accepts a list of Blog objects, finds the largest Blog entry, and creates a context variable that contains the largest Blog. Then you will create a home page that uses the custom template tag to display a link to the largest Blog. First, you need to create a custom template tag library. Follow these steps to create the custom template library, the custom tag, and the home page:
Listing 13.3. Full Contents of iFriends/Custom/templatetags/custom_tags.py
Listing 13.4. Full Contents of iFriends/templates/Home/homepage.html
Listing 13.5. Full Contents of iFriends/Home/views.py
|
Another useful custom tag is the inclusion tag. Inclusion tags are different from normal tags in a couple of ways.
First, you do not need to define a renderer object. Instead, you register an HTML template file that will be used to render the data. The following line of code registers an inclusion_tag with the library that calls the quote.html template file using the QuoteLink compilation function:
register.inclusion_tag('quote.html')(QuoteLink)
The second thing that is different in inclusion tags is that if you pass a variable to the function, the actual value gets passed, not just the name. For example, the following code defines a QuoteLink inclusion tag function that takes a quote object as its only argument and that can access the quote object directly:
def QuoteLink(quote):
    qLink = "<a href=\"quote/%d\"></a>" % (quote.id, quote.by)
    return {'qLink': qLink}
By the Way
If you are passing a lot of arguments and you do not want to put them in the function definition, you can use takes_context=True when registering the node, and then add context as the first argument to the function:
def QuoteLink(context):
. . .
register.inclusion_tag('quote.html', takes_context=True)(QuoteLink)
You can access the variables in the context using the following dictionary syntax:
if context.has_key('quote'):
    quote = (context['quote'])
If you include the takes_context=True argument when registering an inclusion_tag, you need to specify context as the first argument of the compilation function. The name of the context argument must be context for you to be able to access the template context inside the function.
The final thing that is different in inclusion tags is that they return a context dictionary that is passed to the render template instead of a template Node object. In the preceding example, the function builds a variable called qLink and returns it as part of the context dictionary that is passed to quote.html.
To access the inclusion tag from a template, use the following code:
{% QuoteLink quote %}
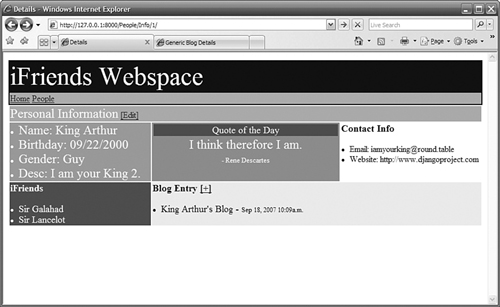
Try It Yourself: Create an Inclusion Tag to Generate a Set of Navigation LinksIn this section, you will create an inclusion tag that generates a list of links that will be rendered in an HTML template. The template will be used to display navigation links for web pages in the site base HTML template file. By the Way You don't need to stop the development server to add the inclusion tag, because you created and opened the library file in the preceding "Try It Yourself" section. Follow these steps to create the inclusion tag, create the navigation link HTML template file, and enable the tag in the site base HTML template:
Listing 13.6. navLink Tag Function and Registration in iFriends/Custom/templatetags/custom_tags.py
Listing 13.7. Full Contents of iFriends/templates/navlink.html
Listing 13.8. Full Contents of iFriends/templates/iFriends_base.html
Listing 13.9. details() View Function in iFriends/People/views.py
|