Previous Page Next Page

Installing an Application

After you have configured and synchronized the database, you can begin installing applications in it. Installing applications is simply a matter of creating an application directory, defining a model, and then activating the application so that Django can access it in the database.

Try It Yourself: Create Your First Application

The first application you will create is an application called People, which will be used to keep track of the individuals who use the website.

1.
From a console prompt, change to the root directory of the iFriends project.

2.
Enter the following command to create a blank application called People:

python manage.py startapp People

The startapp command creates a People directory within the iFriends directory and then populates it with the following files:

  • __init__.py is a necessary file for the application to be used as a Python package.

  • models.py contains the Python code that defines the model.

  • views.py contains the Python code that defines the views for the model.

The files in the application directory define how information for the application will be stored and accessed in the database. They also define how information in the model will be viewed when accessed from the website.


Creating a Model

After the application has been created, you need to create a model for the data that will be stored in the application. A model is simply a definition of the classes, attributes, and relationships of objects in the application.

To create a model, you need to modify the models.py file located in the application directory. The models.py file is a Python script that is used to define the tables that will be added to the database to store objects in the model.

The models.py file initially has only one line, which imports the models object from the django.db package. To define the model, you need to define one or more classes. Each class represents an object type in the database.Create a Model for the People Application

Try It Yourself: Create a Model for the People Application

In this section, you create the class Person in the People model by modifying the Python script, models.py, for the People application. Initially, the script is blank. This section takes you through adding the Python code to define classes in the model.

1.
Open the iFriends\People\models.py file in an editor.

2.
Add the following line of code to the file to import the Django models package into the application:

from django.db import models

3.
Add the following code snippet to define the Person class with name, email, headshot, and text attributes:

class Person(models.Model):
    name = models.CharField('name', maxlength=200)
    email = models.EmailField('Email', blank=True)
    headshot = models.ImageField(upload_to='img', blank=True)
    text = models.TextField('Desc', maxlength=500, blank=True)
    def __str__(self):
        return '%s' % (self.name)

4.
Save the file.

Listing 2.1 shows the complete code for the iFriends\People\models.py file.

Listing 2.1. Full Contents of the iFriends\People\models.py File

from django.db import models

class Person(models.Model):
    name = models.CharField('name', max_length=200)
    text = models.TextField('Desc', max_length=500, blank=True)

    def __str__(self):
        return '%s' % (self.name)

By the Way

The definition for __str__ defines a string representation of the object that can be used in views or other Python scripts. Django uses the __str__ method in several places to display objects as well.


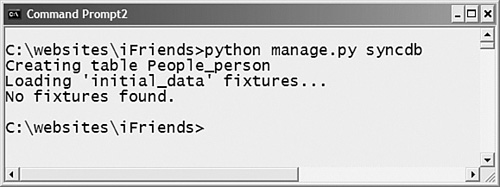
Try It Yourself: Activate the Person Model

This section takes you through the process of activating the Person model by adding it to the INSTALLED_APPS setting in the settings.py file and then synchronizing the database.

1.
Open the iFriends\settings.py file in an editor.

2.
Find the INSTALLED_APPS setting, and add the iFriends.People application to it, as shown in the following snippet:

    INSTALLED_APPS = (
        'django.contrib.auth',
        'django.contrib.contenttypes',
        'django.contrib.sessions',
        'django.contrib.sites',
        'iFriends.People',
)

3.
Save the file.

4.
Synchronize the People application into the iFriends database by using the following command from the root of the iFriends project, as shown in Figure 2.4:

python manage.py syncdb

Figure 2.4. Synchronizing the new People application with the database from a command line.


The syncdb command creates the necessary tables in the iFriends database for the People application. The model is now active, and data can be added to and retrieved from the database using Django at this point.


Previous Page Next Page