Creating the Demo Application (Step 2)
javax.swing.JPanel
(a generic lightweight container) which will supply
the code for rendering our custom painting.

A javax.swing.JPanel Subclass
Click the Launch button to run SwingPaintDemo2 using Java™ Web Start (download JDK 6). Alternatively, to compile and run the example yourself, consult the example index.
package painting;

import javax.swing.SwingUtilities;
import javax.swing.JFrame;
import javax.swing.JPanel;
import javax.swing.BorderFactory;
import java.awt.Color;
import java.awt.Dimension;
import java.awt.Graphics;

public class SwingPaintDemo2 {

    public static void main(String[] args) {
        SwingUtilities.invokeLater(new Runnable() {
            public void run() {
                createAndShowGUI();
            }
        });
    }

    private static void createAndShowGUI() {
        System.out.println("Created GUI on EDT? "+
        SwingUtilities.isEventDispatchThread());
        JFrame f = new JFrame("Swing Paint Demo");
        f.setDefaultCloseOperation(JFrame.EXIT_ON_CLOSE);
        f.add(new MyPanel());
        f.pack();
        f.setVisible(true);
    }
}

class MyPanel extends JPanel {

    public MyPanel() {
        setBorder(BorderFactory.createLineBorder(Color.black));
    }

    public Dimension getPreferredSize() {
        return new Dimension(250,200);
    }

    public void paintComponent(Graphics g) {
        super.paintComponent(g);

        // Draw Text
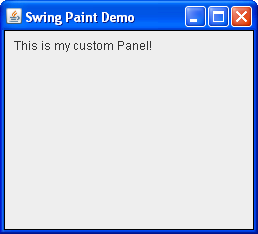
        g.drawString("This is my custom Panel!",10,20);
    }
}
The first change you will notice is that we are now
importing
a number of additional classes, such as JPanel,
Color, and Graphics. Since some of the older
AWT classes are still used in modern Swing applications, it is normal to
see the java.awt package
in a few of the import statements.
We have also defined a custom JPanel subclass, called MyPanel, which comprises the majority of the new code.
The MyPanel class definition has a constructor that sets a
black border around its edges. This is a subtle detail that might
be difficult to see at first (if it is, just comment out the invocation of
setBorder and then recompile.)
MyPanel also overrides getPreferredSize,
which returns the desired width and height of the panel
(in this case 250 is the width, 200 is the height.) Because of this, the
SwingPaintDemo class no longer needs to specify the size of
the frame in pixels. It simply adds the panel to the frame and
then invokes pack.
The paintComponent method
is where all of your custom painting takes place.
This method is
defined by javax.swing.JComponent and then overridden
by your subclasses to provide their custom behavior.
Its sole parameter, a
APILINK (
LINKTEXT java.awt.Graphics
LINKFILE http://download.oracle.com/javase/7/docs/api/java/awt/Graphics.html
)
object, exposes a number of methods for drawing 2D shapes and obtaining
information about the application's graphics environment.
In most cases the object that is actually received by this method
will be an instance of
java.awt.Graphics2D (a Graphics subclass), which provides support for
sophisticated 2D graphics rendering.
Most of the standard Swing components have their
look and feel implemented by separate "UI Delegate" objects.
The invocation of super.paintComponent(g)
passes the graphics context off to the component's UI delegate, which
paints the panel's background.
For a closer look at this process, see the section
entitled "Painting and the UI Delegate" in the aforementioned SDN article.
Exercises:
- Now that you have drawn some custom text to the screen, try minimizing and restoring the application as you did before.
- Obscure a part of the text with another window, then move that
window out of the way to re-expose the custom text.
In both cases, the painting subsystem will determine that the
component is damaged and will ensure that your
paintComponentmethod is invoked.
