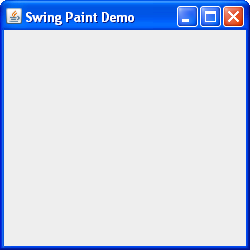
All Graphical User Interfaces require some kind of main application frame in which to display. In Swing, this is an instance of
javax.swing.JFrame. Therefore, our first step is to instantiate this class and make sure that everything works as expected. Note that when programming in Swing, your GUI creation code should be placed on the Event Dispatch Thread (EDT). This will prevent potential race conditions that could lead to deadlock. The following code listing shows how this is done.
An Instance of javax.swing.JFrame
Click the Launch button to run SwingPaintDemo1 using Java™ Web Start (download JDK 6). Alternatively, to compile and run the example yourself, consult the example index.

package painting;

import javax.swing.SwingUtilities;
import javax.swing.JFrame;

public class SwingPaintDemo1 {

    public static void main(String[] args) {
        SwingUtilities.invokeLater(new Runnable() {
            public void run() {
                createAndShowGUI();
            }
        });
    }

    private static void createAndShowGUI() {
        System.out.println("Created GUI on EDT? "+
                SwingUtilities.isEventDispatchThread());
        JFrame f = new JFrame("Swing Paint Demo");
        f.setDefaultCloseOperation(JFrame.EXIT_ON_CLOSE);
        f.setSize(250,250);
        f.setVisible(true);
    }
}
This creates the frame, sets its title, and makes everything visible. We have used the
SwingUtilitieshelper class to construct this GUI on the Event Dispatch Thread. Note that by default, aJFramedoes not exit the application when the user clicks its "close" button. We provide this behavior by invoking thesetDefaultCloseOperationmethod, passing in the appropriate argument. Also, we are explicity setting the frame's size to 250 x 250 pixels. This step will not be necessary once we start adding components to the frame.Exercises:
- Compile and run the application.
- Test the minimize and maximize buttons.
- Click the close button (the application should exit.)

