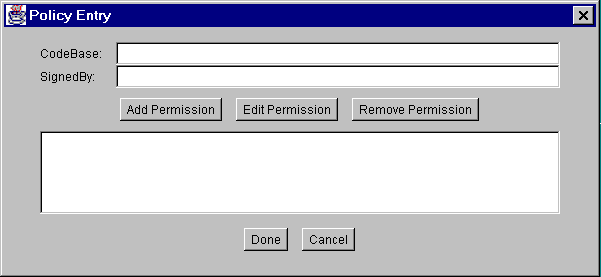
To grant code signed bysusanpermission to read any files in theC:\TestDatadirectory, you need to create a policy entry granting this permission. Note that "Code signed bysusan" is an abbreviated way of saying "Code in a class file contained in a JAR file, where the JAR file was signed using the private key corresponding to the public key that appears in a keystore certificate in an entry aliased bysusan."Choose the Add Policy Entry button in the main Policy Tool window. This brings up the Policy Entry dialog box:
Using this dialog box, type the following alias into the SignedBy text box:
This figure has been reduced to fit on the page.
Click the image to view it at its natural size.susanLeave the CodeBase text box blank, to grant all code signed by
susanthe permission, no matter where it comes from.
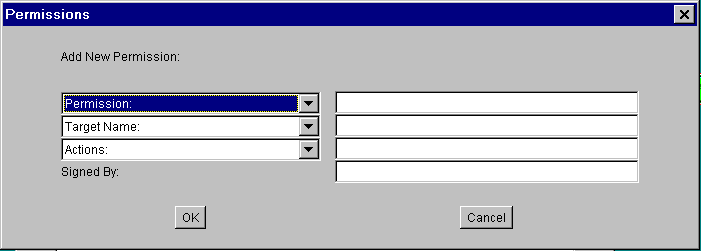
Note: If you wanted to restrict the permission to just code signed bysusanthat comes from theC:\Test\directory, you would type the following URL into the CodeBase text box:file:/C:/Test/*To add the permission, choose the Add Permission button. This brings up the Permissions dialog box.
This figure has been reduced to fit on the page.
Click the image to view it at its natural size.Do the following.
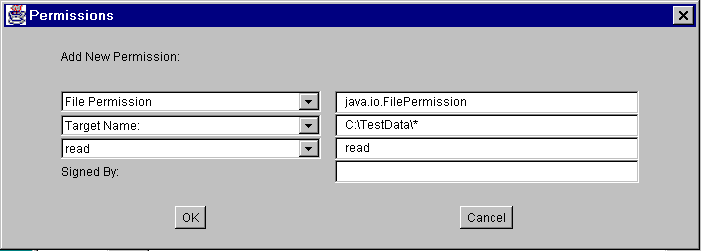
Now the Permissions dialog box looks like the following.
- Choose File Permission from the Permission drop-down list. The complete permission type name (
java.io.FilePermission) now appears in the text box to the right of the drop-down list.
- Type the following in the text box to the right of the list labeled Target Name to specify all files in the
C:\TestData\directory:C:\TestData\*- Specify read access by choosing the read option from the Actions drop-down list.
This figure has been reduced to fit on the page.
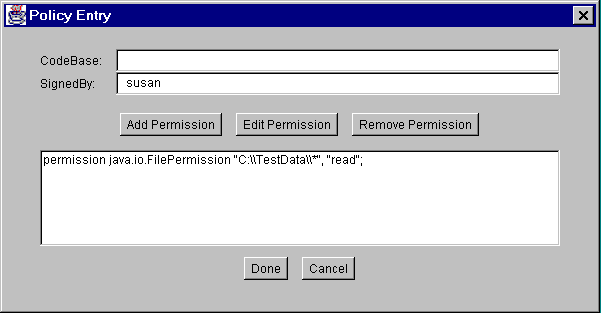
Click the image to view it at its natural size.Choose the OK button. The new permission appears in a line in the Policy Entry dialog, as follows.
This figure has been reduced to fit on the page.
Click the image to view it at its natural size.
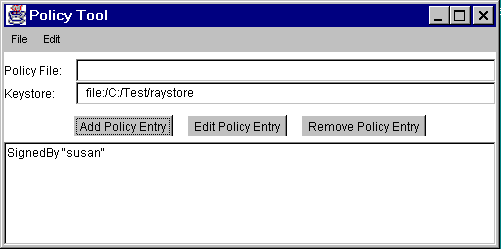
Note: Each backslash in the file path you typed has been replaced with two backslashes, for your convenience. Strings in a policy file are processed by a tokenizer that allows \ to be used as an escape character (for example,\nto indicate a new line), so the policy file requires two backslashes to indicate a single backslash. If you use single backslashes as your directory separators, Policy Tool automatically converts them to double backslashes for you.You are now done specifying this policy entry, so choose the Done button in the Policy Entry dialog. The Policy Tool window now contains a line representing the policy entry, showing the SignedBy value, as shown in the following figure.
This figure has been reduced to fit on the page.
Click the image to view it at its natural size.
